Lab 9 – IDS/IPS Deployment & Configuration
Deploy and configure a dedicated IDS/IPS sensor to monitor mirrored network traffic and detect malicious activity in real time.
Objective Lab goal
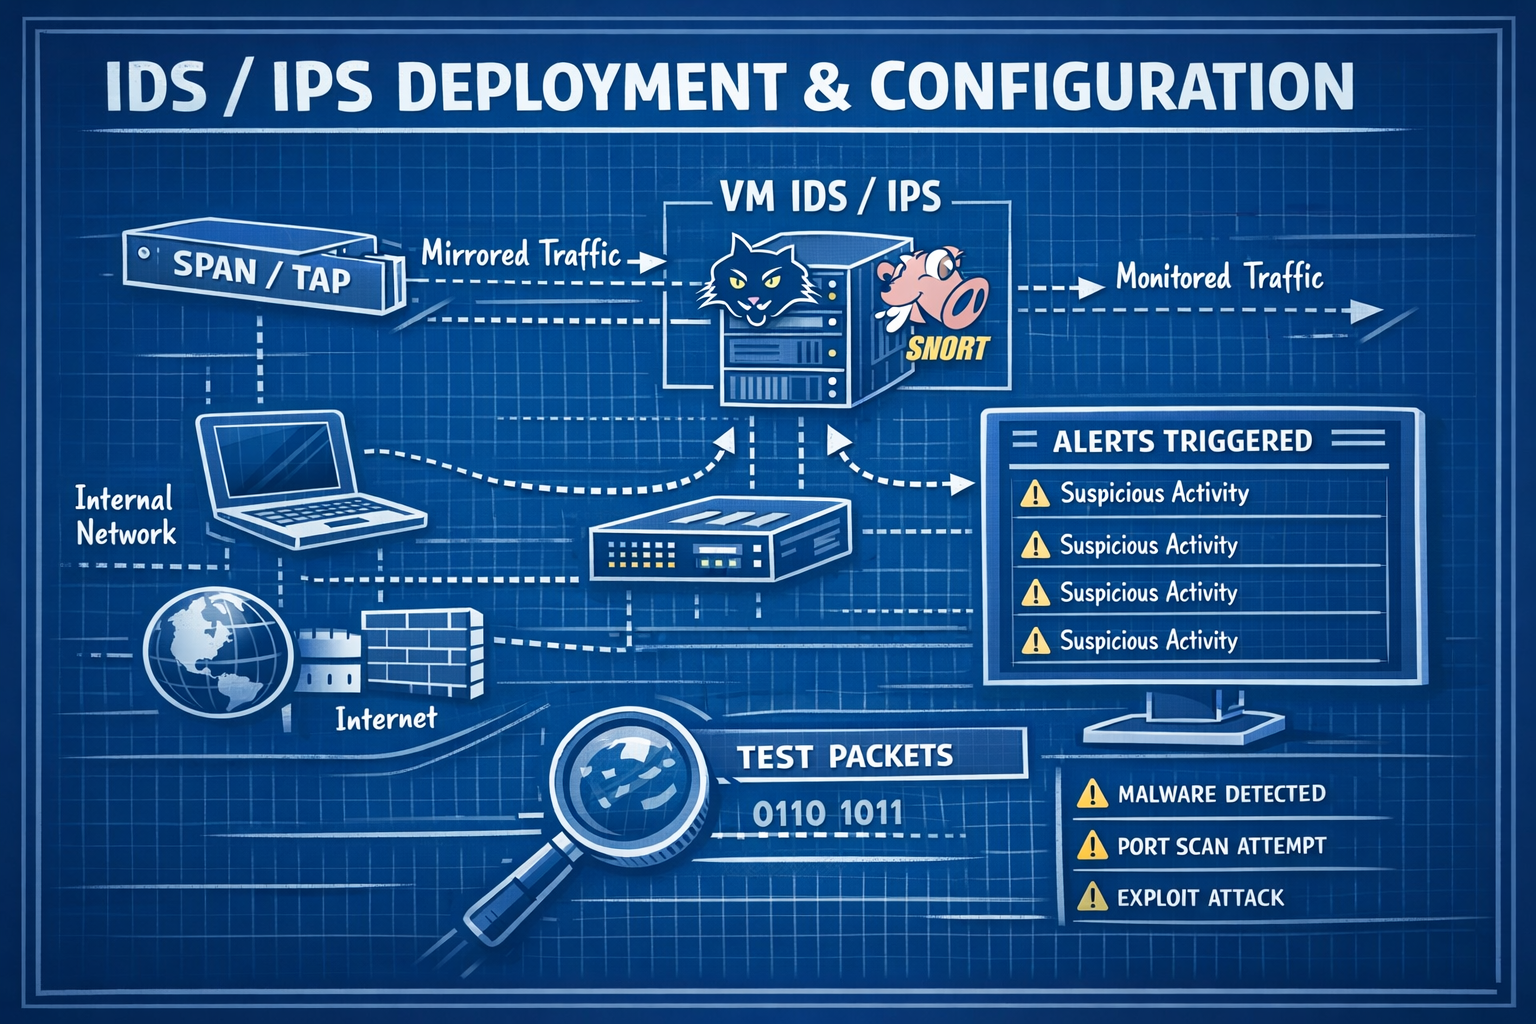
This lab introduces network‑level intrusion detection and prevention. You’ll deploy Suricata or Snort on a dedicated VM, configure mirrored traffic from OPNsense, and validate alert generation using test packets.
- Outcome 1: IDS/IPS VM deployed and operational.
- Outcome 2: Network interface configured for mirrored traffic.
- Outcome 3: Suricata/Snort rules enabled and tuned.
- Outcome 4: Alerts generated and validated using test traffic.
Lab 9: Deploying Suricata/Snort and monitoring mirrored traffic from OPNsense.
Deliverables End‑of‑lab checklist
- DL9.1: IDS/IPS VM deployed (SURICATA01 or SNORT01).
- DL9.2: Network interface configured for packet capture.
- DL9.3: Rulesets enabled and updated.
- DL9.4: Alerts generated from test traffic.
- DL9.5: Documentation updated with configuration details.
Lab Steps Step‑by‑step instructions
Step 1 – Deploy IDS/IPS VM
~30 minutes- Download Suricata or Snort ISO/installer.
- In Proxmox, create a VM named SURICATA01 or SNORT01.
- Assign:
- CPU: 4 vCPUs
- RAM: 8 GB
- Disk: 64–128 GB
- Network: vmbr10 (Lab LAN)
- Install OS and verify connectivity.
Step 2 – Configure Mirrored Traffic
~45 minutes- On OPNsense, navigate to Interfaces → Other Types → Port Mirror.
- Mirror LAN traffic to the IDS/IPS interface.
- Confirm packets are visible using:
tcpdump -i eth1
- Verify traffic volume matches expected LAN activity.
Step 3 – Enable and Tune Rulesets
~60 minutes- Enable community rules (ET Open, Snort Community, etc.).
- Update rulesets and reload engine.
- Disable noisy or irrelevant rules (e.g., outdated signatures).
- Enable high‑value rules:
- SSH brute‑force
- Port scans
- Suspicious DNS queries
- Malware C2 patterns
Step 4 – Generate Test Alerts
~45 minutes- Run a controlled Nmap scan from WIN10‑LAB:
nmap -sS 10.10.10.1
- Trigger DNS anomalies using test domains.
- Verify alerts appear in IDS/IPS console.
- Document alert accuracy and timing.
Reflection What you should understand now
- Visibility: How IDS/IPS sensors detect malicious network activity.
- Rulesets: How signatures and heuristics identify threats.
- Correlation: How network alerts complement SIEM host‑based detections.
With your IDS/IPS deployed, you now have deep visibility into network‑level threats. In Week 10, you’ll expand this by capturing and analyzing traffic using Wireshark and Zeek.